Guides 8 min read
Serger Tension Problems: Every Fix, Stated Plainly
Loops on top mean the needle tension is loose; loops underneath mean the loopers are. Read the stitch, then fix one dial at a time. The full diagnostic order.
Serger tension problems follow patterns. Loops visible on the back of the seam point to one set of adjustments. Skipped stitches point to another. Puckering points to a third. This page covers each symptom, what causes it, and what to change.
Before adjusting any tension dial: re-thread the machine. A thread that jumped out of a tension disc during sewing is the most common cause of sudden tension problems, and re-threading fixes it without touching the dials.
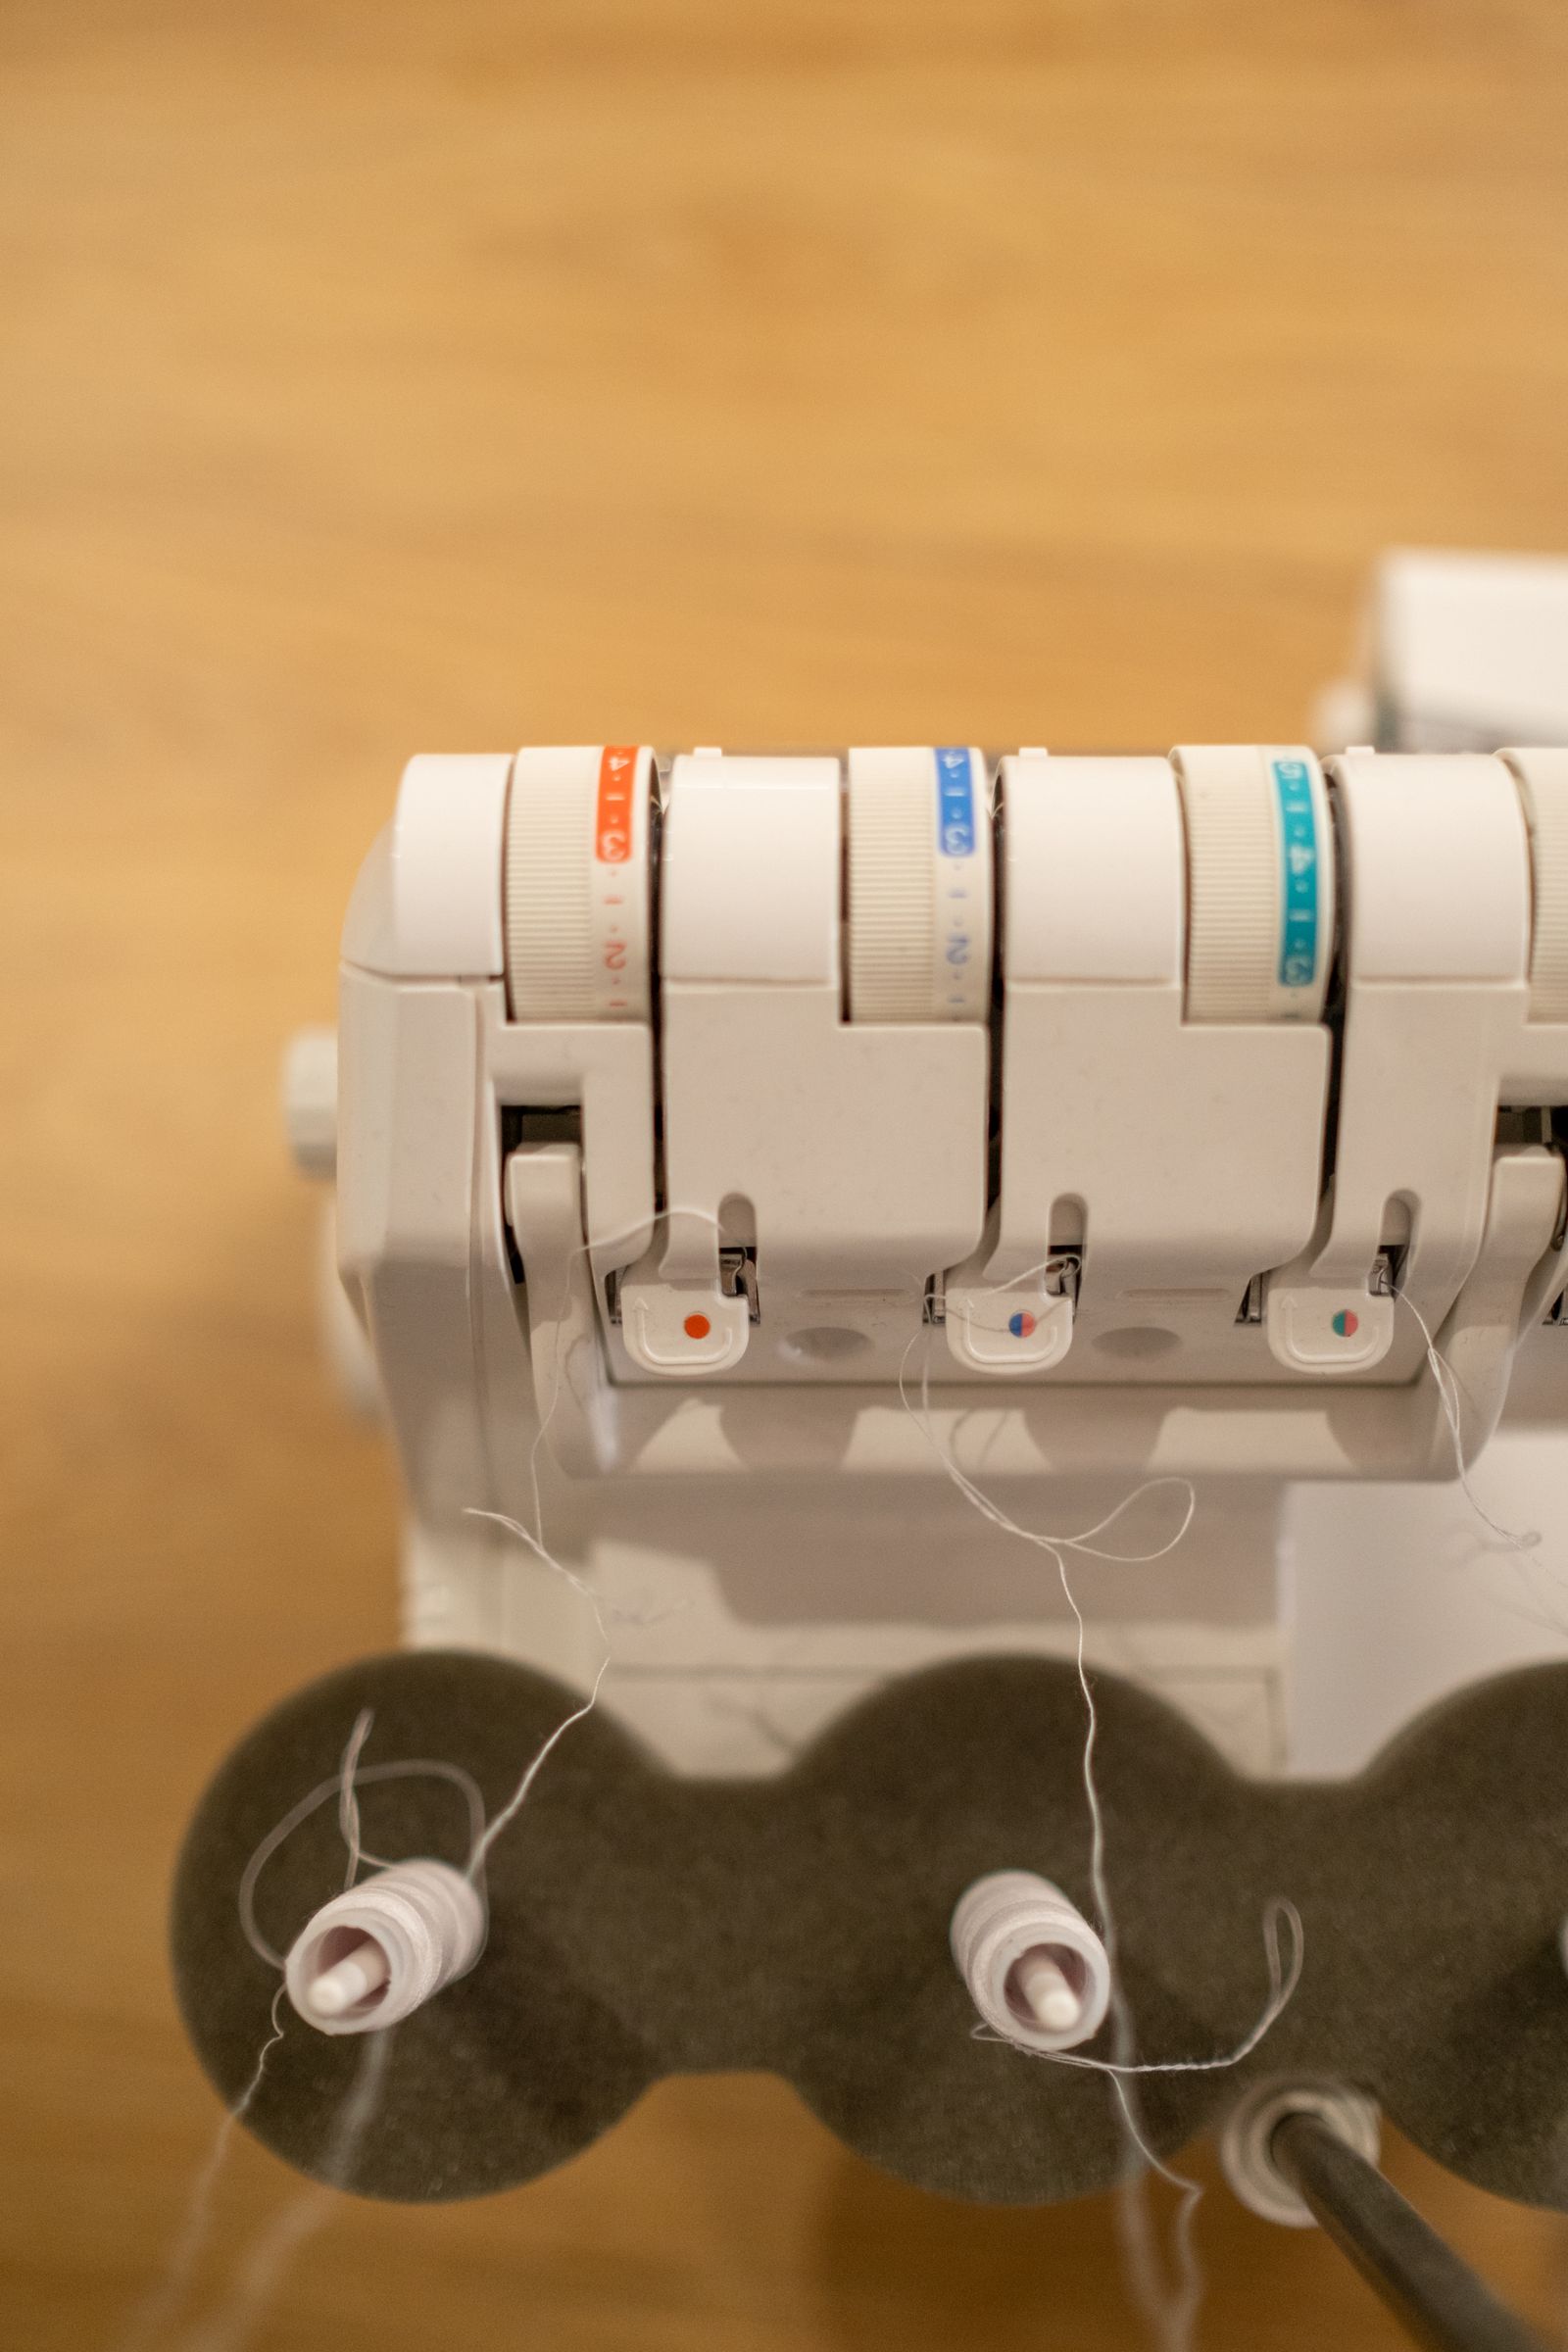
The four tensions on a serger
A 4-thread overlock machine has four independent tension controls:
| Thread | Controls |
|---|---|
| Left needle | The left needle’s stitch line tension |
| Right needle | The right needle’s stitch line tension |
| Upper looper | The upper looper thread that wraps over the top of the fabric edge |
| Lower looper | The lower looper thread that wraps under the bottom of the fabric edge |
Standard starting tension on most machines (including the Brother 1034D and Juki MO-654DE) is 4 to 6 on each dial, with 5 as the neutral midpoint. Always return to this baseline before troubleshooting if tensions have been adjusted and you’re not sure where you started.

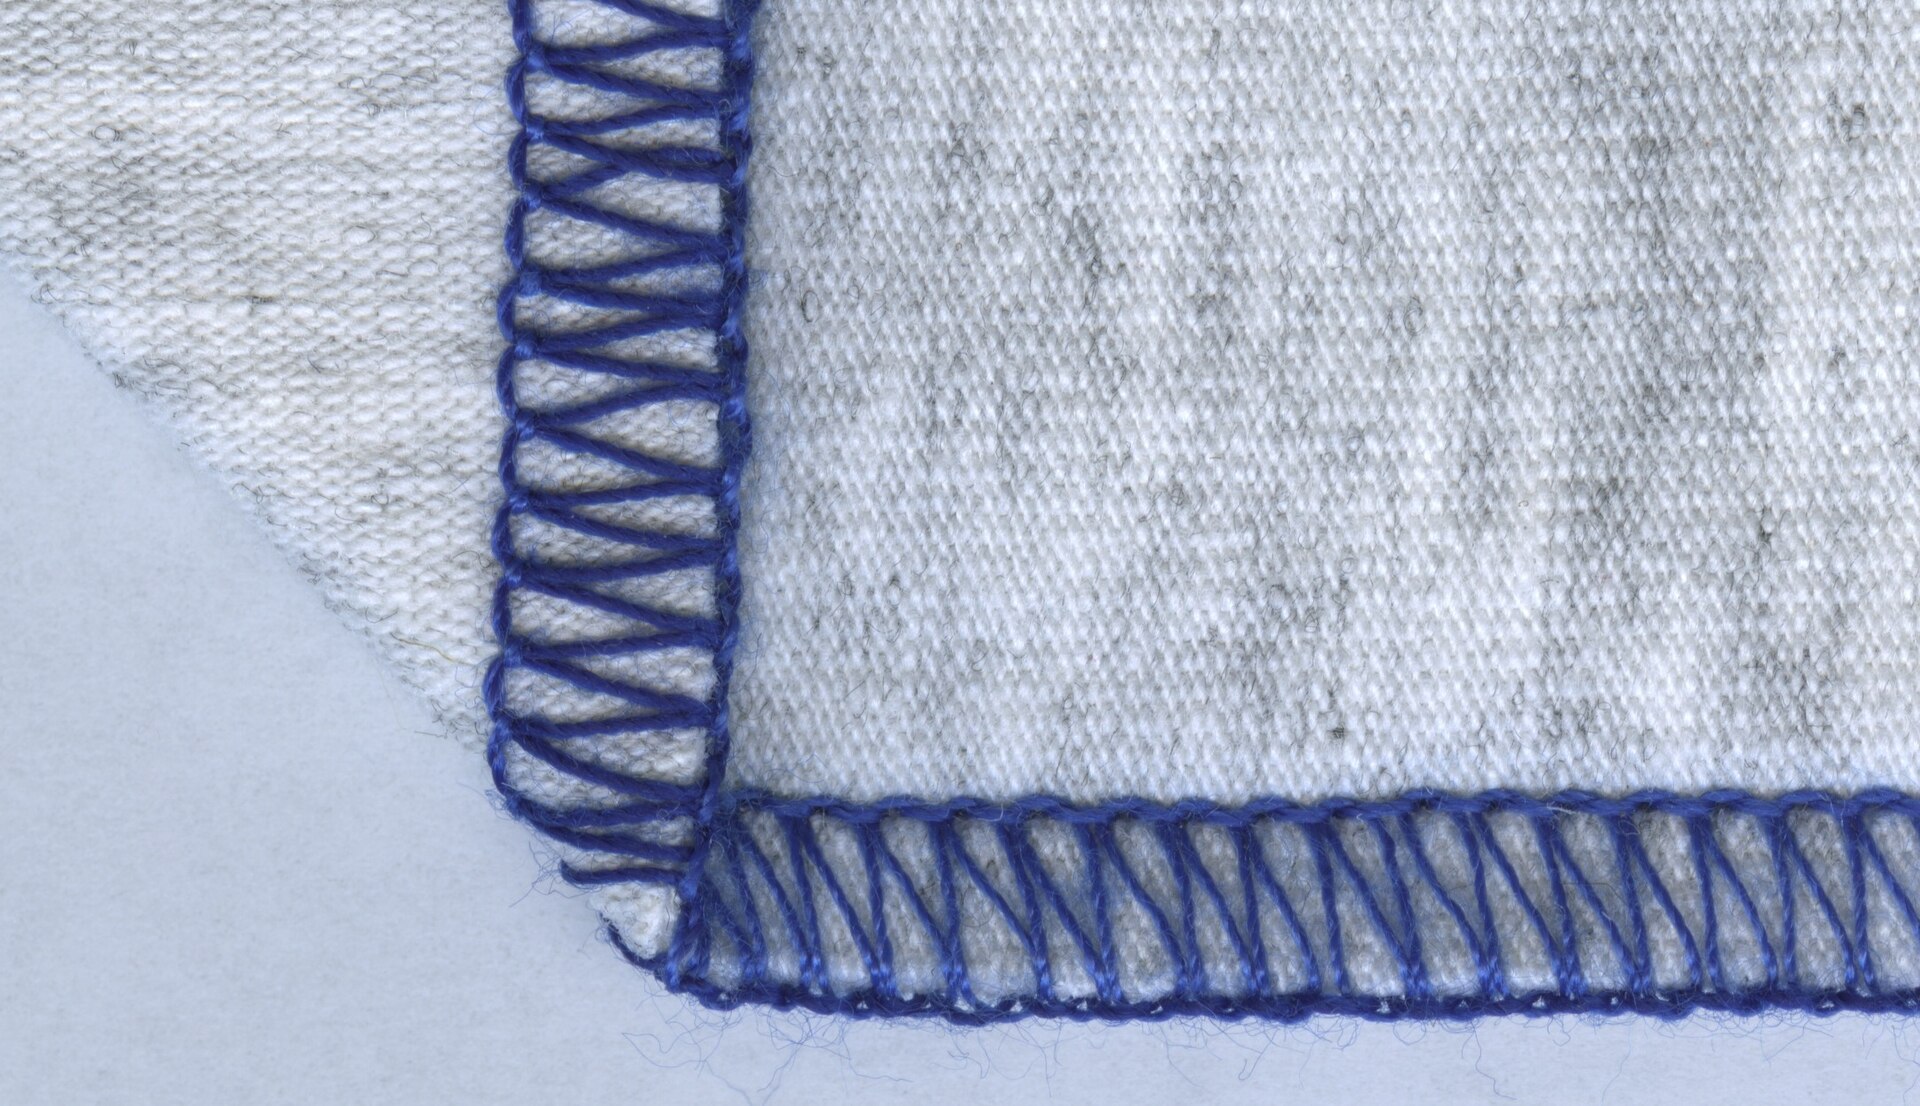
Symptom: loops on the back of the fabric
The most common complaint. The upper looper thread, which should wrap around the edge of the fabric and end on the underside exactly at the edge, instead creates visible loops on the back of the seam.
What it means: the upper looper thread is being pulled too far to the underside. Either the upper looper tension is too tight (pulling the thread down) or the lower looper tension is too loose (not holding the lower side enough to keep the join at the edge).
Fix sequence:
- Re-thread the machine completely, presser foot raised. This is the fix 70% of the time.
- Raise upper looper tension by one number. Test on scrap.
- If loops persist: lower looper tension one number lower. Test on scrap.
- If adjusting two dials doesn’t resolve it: check needle position and condition. A slightly bent needle changes stitch geometry even if tension settings look right.
Symptom: lower looper thread visible on the top
The lower looper thread shows on the top surface of the seam, which means the lower looper thread is being pulled upward through the fabric edge.
What it means: the lower looper tension is too tight, or the upper looper is too loose, pulling the join point up.
Fix sequence:
- Re-thread, presser foot raised.
- Lower the lower looper tension by one number. Test.
- If the problem persists: raise upper looper tension by one number. Test.
Symptom: skipped stitches
One or more stitches miss, producing an irregular stitch line. The fabric passes through the machine but the needle does not catch the looper thread in a given cycle.
What it means: usually the needle. Less commonly, threading.
Most likely causes, in order:
- Needle inserted incorrectly. The flat side must face directly to the back of the needle clamp. If the needle has rotated even slightly, the needle eye is not in the path of the looper hook and stitches skip. Remove the needle, reinsert with the flat side toward the back, push it fully into the clamp before tightening the screw.
- Needle bent or dull. A needle that has been in service through several hours of sewing can be bent enough to miss the looper. Replace the needle, especially if the machine has been used on heavy fabric or denim.
- Thread missing a guide in the upper looper path. The upper looper path has more thread guides than any other path on most machines. Misthreading that skips a single guide can cause intermittent skipped stitches even if everything looks correct from a distance. Re-thread slowly, following the color-coded diagram on the machine body.
- Thread too heavy for the tension disc. Very thick decorative thread (30wt or heavier in the loopers) can reduce looper travel and cause occasional skips. Reduce tension slightly when using heavier decorative thread.
Symptom: seam puckering
The finished seam gathers or puckers, pulling the fabric along the stitch line.
Main causes:
- Needle tension too tight. The needle thread compresses the fabric at each stitch. Reduce both needle tensions by one number and test.
- Differential feed set too high. Differential feed above 1.0 intentionally gathers the fabric. For flat seams on woven fabric, set differential feed to 1.0.
- Needle too heavy for the fabric. A size 14 needle makes a larger hole than a size 11. On light fabric (chiffon, voile), larger needles create puckering at each stitch entry point regardless of tension. Use a size 11 (75/11) or 12 (80/12) needle for lightweight woven fabric.
- Thread too heavy. Serger thread heavier than 120/2 in the needle positions can cause visible puckering on fine or lightweight fabric. Match thread weight to fabric weight.
Symptom: uneven seam width (wavy edge)
The fabric edge weaves in and out rather than following a straight line through the cutter blade.
What it means: the fabric is not feeding at a consistent rate, or the presser foot pressure is uneven.
Fix sequence:
- Check differential feed. If set above 1.2 on light fabric, the front feed dog may be pulling the fabric slightly sideways as it gathers. Return to 1.0 and test.
- Increase presser foot pressure slightly. Light presser foot pressure allows the fabric to move laterally during feeding. Most machines have a presser foot pressure adjustment dial.
- Guide the fabric more actively into the knife. Don’t let the fabric fold or pile up in front of the presser foot. Feed smoothly, holding fabric taut (not stretched) in front of and behind the presser foot.
How to thread correctly (the prerequisite for all of the above)
Threading order matters on a serger. Thread the loopers before the needles. The standard sequence on most 3/4-thread machines:
- Upper looper (typically labeled in blue on the machine body)
- Lower looper (typically labeled in purple or pink)
- Right needle (typically labeled in yellow or green)
- Left needle (typically labeled in red or another color)
The presser foot must be raised while threading. Raising the presser foot opens the tension discs. If you thread with the presser foot down, the thread sits outside the tension discs and produces no tension at all. The stitch chain will be loose regardless of dial settings.
Use the machine’s built-in color-coded threading guide. The Brother 1034D review and Juki MO-654DE review both cover threading in the context of those specific machines. The threading diagrams are machine-specific; if you are threading a different model, use that model’s manual.
Standard tension starting points by fabric type
| Fabric | Differential feed | Needle tensions | Looper tensions |
|---|---|---|---|
| Woven medium weight (cotton, linen) | 1.0 | 4-5 each | 4-5 each |
| Lightweight woven (voile, silk) | 0.9-1.0 | 3-4 each | 3-4 each |
| Knit (jersey, ponte) | 1.2-1.5 | 4-5 each | 4-5 each |
| Heavy knit (sweatshirt, stretch terry) | 1.5-2.0 | 4-5 each | 4-5 each |
| Rolled hem (any fabric) | 0.9 | Right needle 4-5; remove left needle | Upper looper 6-7; lower looper 2-3 |
These are starting points, not final settings. Fabric batches, thread weight, and ambient humidity all shift how a given dial number performs. Always sew a test chain on a folded piece of the actual fabric you are using, examine both sides, then adjust.
When the tension problem isn’t tension
Not every stitch problem is caused by tension adjustment. Common misdiagnoses:
- Thread looping under the fabric after the cut (not at the seam): the thread chain is not being held taut at the start of the seam. Hold the thread chain behind the presser foot as you begin each seam, then let it drop. Do not start sewing with the needle positioned inside the fabric edge.
- Fabric tunneling (the seam tube pulls the fabric): if the seam margin curls into a tube, the stitch width is too narrow for the fabric weight or the tensions are too tight. Widen the stitch by adjusting the blade position (if adjustable) or by running a wider seam allowance into the knife.
- Thread breaking consistently at one needle: the needle is either in the wrong position (check flat side toward back), the thread has a weak spot or is too old, or the needle is the wrong type for the fabric. Industrial needles and home serger needles use the same shank on most machines. Use HAx1 or equivalent per your manual.
The Brother 1034D vs Juki MO-654DE comparison covers how the threading and tension setups differ between the two most common entry sergers. For needle selection by fabric type, the machine-needles guide covers the full cross-reference.